
You may have already heard about the exciting capability to create your own shortcuts for various functions in AnyCase. Wondering how to assign custom shortcuts for case conversion across Windows programs? This article will guide you through the process.
Steps to Assign Custom Shortcuts in AnyCase
Step 1: Start AnyCase
Launch the AnyCase app on your computer. If you don’t have it yet, follow these steps to install AnyCase.
Step 2: Open AnyCase Settings
The AnyCase pop-up window, will be displayed on the right-hand side of your screen. Check the bottom area of the window for a gear icon, which represents AnyCase settings, and click it.
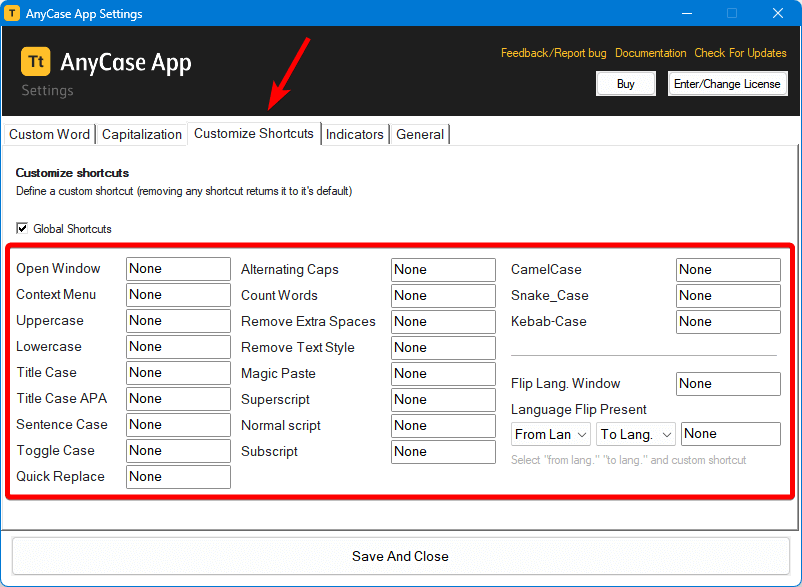
Step 3: Go to “Customize Shortcuts”
Navigate to the “Customize shortcuts” tab. You’ll see the list of shortcuts possibilities with an input box to the right of them, the reason why these boxes are showing “None” is that you haven’t set any shortcuts of your own yet. The input boxes will allow you to enter only combinations that are allowed within any case, removing a shortcut is also extremely easy just enter the input field and delete the shortcut you’ve assigned.
Step 4: Edit Shortcut Fields
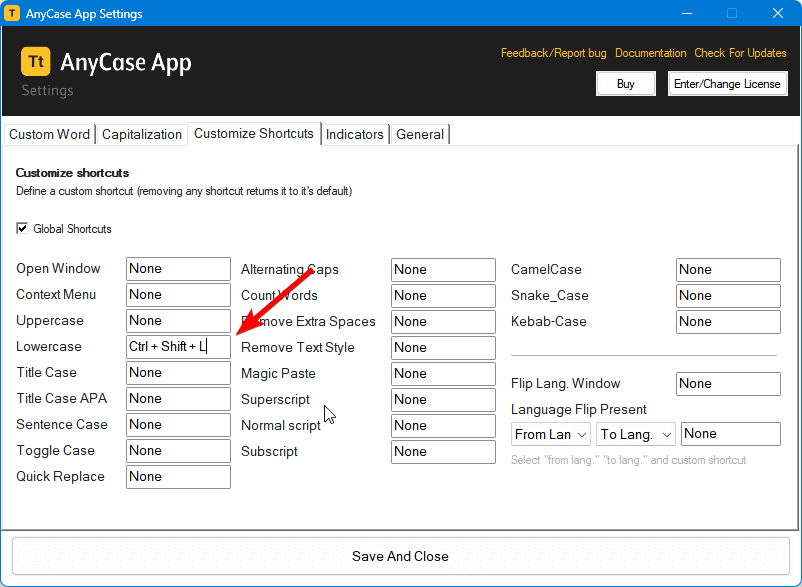
Double-click on the box next to the function you wish to assign a new shortcut. The format for a custom shortcut is “Ctrl+Alt+(any key of your choice).” Press any key you’d like to use for the shortcut. Once done, move to the next function box and repeat these steps.
Step 5: Save Shortcuts
Click “Save and Close” when you’re through.
Step 6: Test Shortcuts
Examples of case conversions
After you’ve customized your shortcuts in AnyCase, it’s time to give them a try. For the purpose of this test, open the text editor of your choice. Let’s test the shortcuts we assigned for case conversions.
Changing Text to UPPERCASE (All Caps)
Since we defined Ctrl+Alt+U as the shortcut for converting text to UPPERCASE, we’ll select the text whose case we want to change. For this test, we use Ctrl+A to highlight the text. Immediately after pressing Ctrl+Alt+U, the selected text will switch to UPPERCASE.
Changing Text to lowercase
Our custom shortcut for changing text capitalization to lowercase, we highlight the text and press Ctrl+Alt+L.
Changing Text to Title Case
The personalized shortcut for switching text case to Title Case is Ctrl+Alt+T. Pressing these keys does the job.
Changing Text to Title Case APA
APA formatting follows different rules for converting words to Title Case depending on the part of speech to which they belong. When we apply the Ctrl+Alt+1 shortcut that we defined earlier, the selected text changes to Title Case APA.
Converting Text to Sentence case
The text we’re using for our test is already in the Sentence case. But if it weren’t, Ctrl+Alt+S, our custom shortcut, would switch it to the Sentence case.
Converting Text to AlTeRnAtInG CaPs
To perform this function, we press Ctrl+Alt+2.
Removing Extra Spaces
With Ctrl+Alt+4, we can instruct AnyCase to clear any additional spaces between words.
Wrapping Up
The customized shortcuts are now working across Windows, and in the software you’re using. Each shortcut must be unique to avoid conflicts, meaning you can’t assign the same shortcut to the same case conversion. However, the key that you add to the “Ctrl+Alt” combination must be a single character. For example, “Ctrl+Alt+T” is acceptable. As you continue to use AnyCase, you’ll become more proficient with your custom shortcuts, enhancing your text case conversion skills.
Don’t have AnyCase App yet? Click here to download and try it!.